Bibliographie:
luke Ahearn 3D game environment first and second edition
2 very interesting book specially the second edition witch is main focus is texturing they were my first investment and are a very good introduction to the world of texturing and game environment
Michael Ingrassia Maya for games
this book was not only focused on texturing but was one of the only one that had a good explanation on how to use a normal map
Owen Demers Digital texturing and painting
a very interesting book instead of only focusing on creation technique this book help you to try to have a better understanding of what you looking at by exercising your mind eye"as they call it in the book" it was very helpful in the creation of my textures it helped me to be more analytic about the materials that i had to texture and made the layering process a lot easier
David Franson The dark side of game texturing
Another very interesting book specially for techniques was very helpful in creating decayed textures
Derek lea Creative Photoshop CS4
this book was very helpful to help me develop my photoshop skills my plan was to try to create most of my textures on photoshop and this book showed me how to create my own custom brushes it was one of the most helping tool in creating the textures
Video
in terms of texturing the main videos that i watched were from digital tutors i did not post any video for copyright issues but the one that i watched were:Digital Tutors - Maya - Introduction to Hyper-shade;Digital Tutors - Maya in Production - Advanced Texturing;Digital Tutors - Maya, Photoshop - 3D Texturing in Maya and Photoshop. all those videos were very helpful as they take you thru the making of different textures using different techniques
For the UV mapping appart from some of the book cited earlier the main source of information was found again in a digital tutor video tutorial:Digital Tutors - Maya - UV Layout.
The UV mapping was originally assigned to another member of the group but because of the workload and the short amount of time left i decided to do it myself as i understood most of the basic principles so that the work could be produce on time
TEXTURING RESEARCH NOTES
Shaders: also called material they define the surface property of an object how shiny, bumpy, how lights affect it
Texture: they are the bipmap that are plugged to the texture
Texturing theory: Found the story behind the object
Texturing a door for example:
What material is it
How old, who use it, which way does it swing open
Has it been repainted if so what colours
What else can be had to the source image in order to make it more interesting
Colour Depth (most use in Gaming as they are the most friendly with memory)
4bit+16 color/8bit=256color/16bit=65536color/24bit=16777215color
*(32bit=16777215colors+8bit alpha channel) for high resolution and needed to use different kind of map
Resolution(texture size)
32*32/64*32/64*64/128*64/256*128/256*256/512*256/512*512/1024*1024 (Work in multiples of 2)
Where to use pixel
Think about Physical size and distance
For large element use a 512*512;for floor u can sometime use a smaller texture that is tiled several time for example a 128*128 texture tiled 3 times in each direction
Layering Texture in Photoshop
For example if u are doing a metallic texture use different layer piled with different level of opacity ex: L1=100%/L2=29%/L3=37%/L4=16%
Most often used tool for texturing
Image mode/image size/rotate canvas/image adjustment/brightness contrast/colour balance/hue saturation
*Adjustement layer :it allow you to adjust different aspect( hue/saturation or brightness/contrast) of all the layer under it
Drop Shadow: very useful tool to give more shadow to you texture if you know where the light is coming from
Outer glow; bevel and emboss again wake sure to know where the light is coming from
FILTERS:
Plastic Wrap; Gaussian blur and sharpen (opposite effect)
Add noise: give a more realistic feel to your texture; craquelure
MAYA HYPERSHADE MATERIAL
Anastropic : good for brush metal; velvet;(give materiel a define specular highlight)
Blinn: good for soft metal plastic and leather
Lambert (default shader): good for object that don’t reflect light
Phong: good for glass; very shiny plastic and metal like chrome
PhongE: it has a softer highlight than the phong and has 2 more control( roughness and colour whiteness
ROOM TEXTURING:
the style we are trying go for is realistic looking environment that is very old where all the object composing the room are dusty and decayed
objects:
Picture frame:the first model i received from the group modeller Jure Bralic

i decided to unwrap the UV's of this object to experiment and have more control over the different stains
UV Snapshot

material:
wood texture that i offseted and used as an overlay on the base colour of the frame

metal texture used for metallic parts

i created a dust texture using 2 concrete texture overlapped with a low opacity on each


this dust texture was the main textures used for all the object dust layer at diferent level of opacity

images i used to create some stains and crack for the glass all the the source images were found from picture taken during museum group visits google and from an image collection from Total Textures like those 3 images that were very helpfull to create some of the stains and glass cracks on my textures


final texture

model with textures


Mirror made by Jure

image used for creating the mirror metal tecture

same texture retouched on photoshop

glass texture with alfa channel

object with final texture

Sofa chair made by Jure

source images


UV snapshot

for the texturing i used a very dark green base colour and a leather texture that i offseted and used as a pattern
Final texture

texture bump

object with final texture

the other stain were made using some brushes created in photoshop and erasing some part of the dust layer
letter and pen model made by Jure

for the writing on the letter i found a letter from a second world war soldier to his wife
3 May 1944 There has never been any doubt in my mind that our future will be as happy, if not happier, than our past. Our past has been marred by short get togethers and long departures. I'm sure that the happiest day of my life will be when all this is over and I finally come home to you to stay. I don't know if you still expect me home in a few months, but if you do, I regret to say that it will be longer than we thought. I love you with all my heart honey.
http://www.war-experience.org/history/keyaspects/l
the texturing was all done on photoshop using brushes and layer blending mode color burn was the most used in that case i also created an alfa channel to the pen to create cracks
letter and envelope texture from uv snapshot

pen textures

http://www.war-experience.org/history/keyaspects/l
the texturing was all done on photoshop using brushes and layer blending mode color burn was the most used in that case i also created an alfa channel to the pen to create cracks
letter and envelope texture from uv snapshot

pen textures

pen tip

objects with final textures


cupboard model made by Jure

source images


UV smapshot

clean version of textures with all base color

dust map and other stain added

handles texture made with same dust map and photoshop spatter brushes

final model with textures

the first cupboard was a good experiment as well specially for experimenting on paint decay
and made the second cupboard more easy to produce
second cupboard model made by Jure

UV snapshot

texture with dirt map
i found a very interesting technique in the dark side of game texturing book showing how to create convincing paint decay using the selection tool a quick mask and the spatter brush filter

the paper texture were made using custom brushes created in photoshop using scans of coffee stain an others set up on colour burn with a sepia layer at low opacity and the same dust map

model with final textures

gun model made by Jure

source image
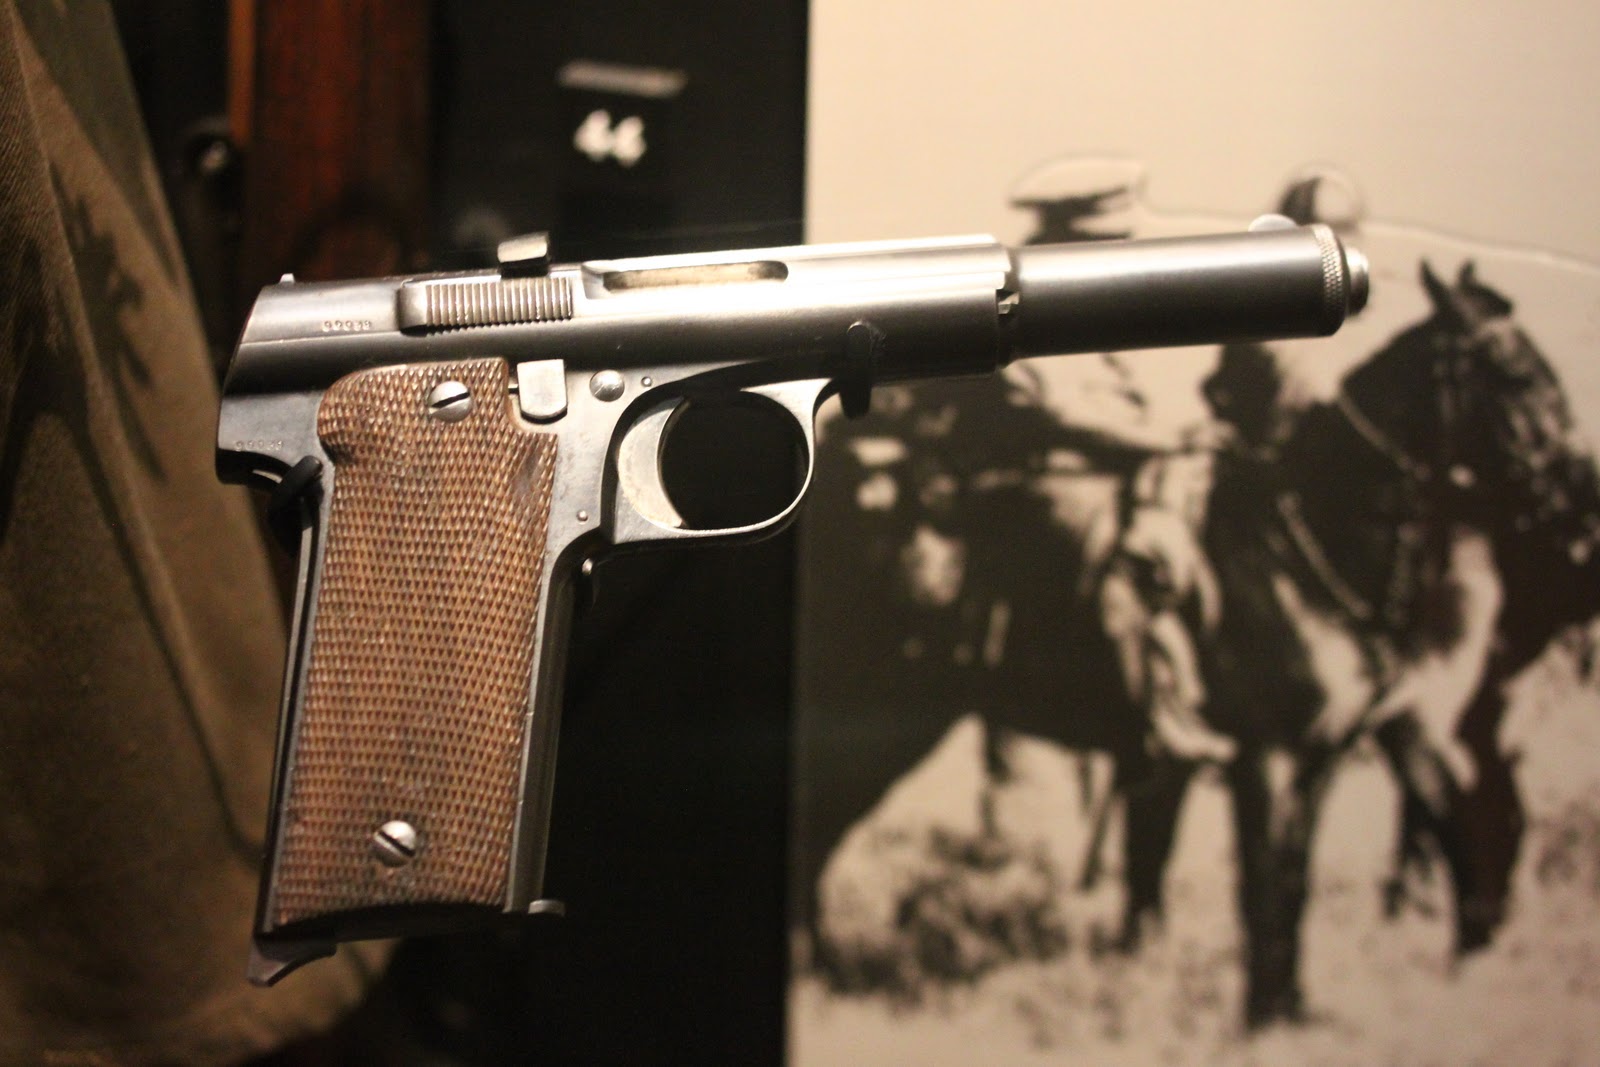
gun metal texture with dust map applied to it

wood texture for handle i added some stain to the texture to help push the old look of the object

the source image has some criss-cross on the handle and the big screws needed a gap so i created a bump map for each
handle bump original patern created in photoshop

final tiled version

screws bump

model with final textures


main table made by Jure

source image

i decided to unwrap the table as it was one of the biggest item in the room and has a lot of object on it so that i could have more control over the texturing
UV snapshot

material
wood picture was used as an overlay to create a wood pattern on the top of the base color

the metal textures is the same overlay principle with 3 different base colour


texture clean and texture with dirt map applied

the water stain were made using a photoshop custom brush

model with final textures clean and dirty version


all the other models with wood were done the same way by applying a wood texture
so i ll only added the extra textures when relevant
main chair model made by Jure

source image


model with final texture

side chair model made by Jure

i added a bump to create some damage and changed the wood texture a bit for this model
wood texture and bump map


Model with final texture


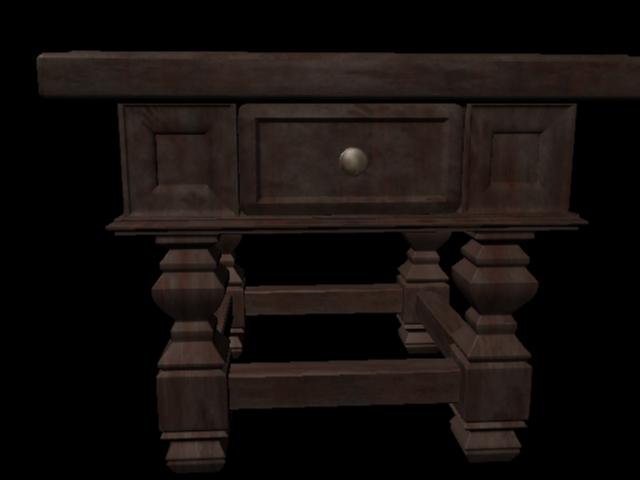
side table model made by Jure

for this table i changed the wood patern
wood patern source image

Final wood texture

for the dirt map i try to create a hand mark and stain using default photoshop brushes and others that i created with the robber tool at different level of flow and opacity

metal texture this textures created was used for different objects by changing the colour range and applied most of the techniques that i learned

model with final textures

Big picture frame model model made by Jure

source image those image were found in museums visit and google which i added a dirt ma to


wood texture
model with final textures


book shelf model made by Jure

book source image found in museums and google

book cleaned up with dirt map applied to them


Model with final textures

coat-hanger model made by Jure

the only thing added was the metal texture of this model

model with final textures


Vinyl player model made by Jure

vinyl player UV snapshot

source images
vinyl covers from artist of that time


textures
metal

bump map made with the noise and radial blur filter


vinyl frame texture

model with final textures


phone model made by jure

source images


textures


models with final textures

pocket watch model made by Jure

source images


textures
base gold color

Face

tiff file texture for glass material showing unwrap uv's

model with final textures
model with final textures

smoking pipe model made by Jure

source image

textures
this celtic patern was used to create a bum ma on the pipe


Model with final texture clean and dirty version


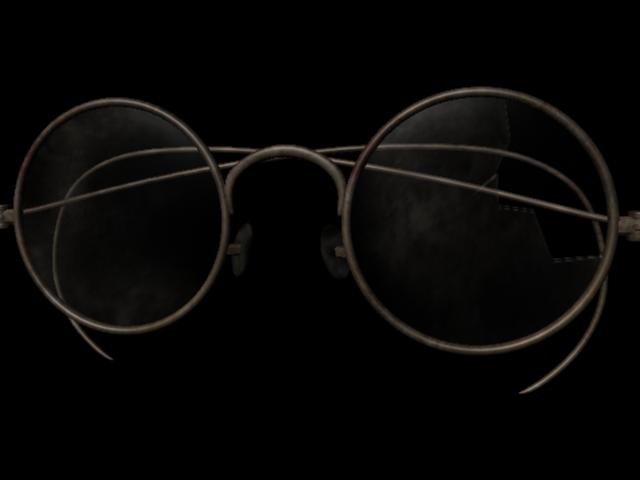
glasses model made by Jure

textures

glass material texture showing alfa channel for crack

model with final textures
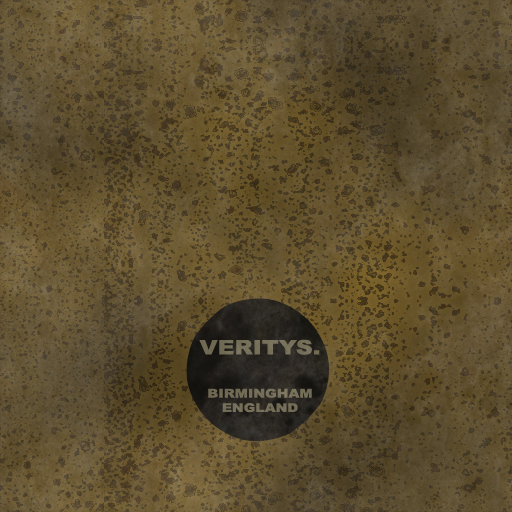
name plate model made by Jure

for the name i researched internet for the most common british names in the 1030's
the name and surname that came up the most were William and Robinson
textures


bump map

textured model

glasses model made by Jure

there is different bottles and glass but they were textured using the same method a dust texture with a alfa channel for transparency
texture

textured models

Map model made by Jure

source image found on google

textured model with dirt map applied to image

Radiator model made by Jure

textures


textured model

candle holder model made by jure

textured model

carpet model made by Jure

source image

textured model with dirt map added to image

clock model made by Jure

source image

texture showing unwrap UV's saved as a tiff for glass crack alfa channel

textured model

door model made by jure

door texture with unwrap UV's shown

textured model

Fan model made by Jure

source image

textures

textured model


Lamp model made by Jure

source image


texture

textured model

light swich model made by Jure

textured model

ashtray model made by Jure

textured model

room structure with piping and light model made by Jure

textures


textured room

after group discussion it was decided that the walls needed changing
Source image


texture with stains and dirt map

floor texture

Bump map

render with final wall texture the bump map looked a bit too high and was reduce before the final render

intro tv and room model made by Jure

textures for walls and celling
source images


textures
roof

walls

textured models

outside view model made by Jure

textured model

Concept Art and Story boarding made by Kieron Proverbs


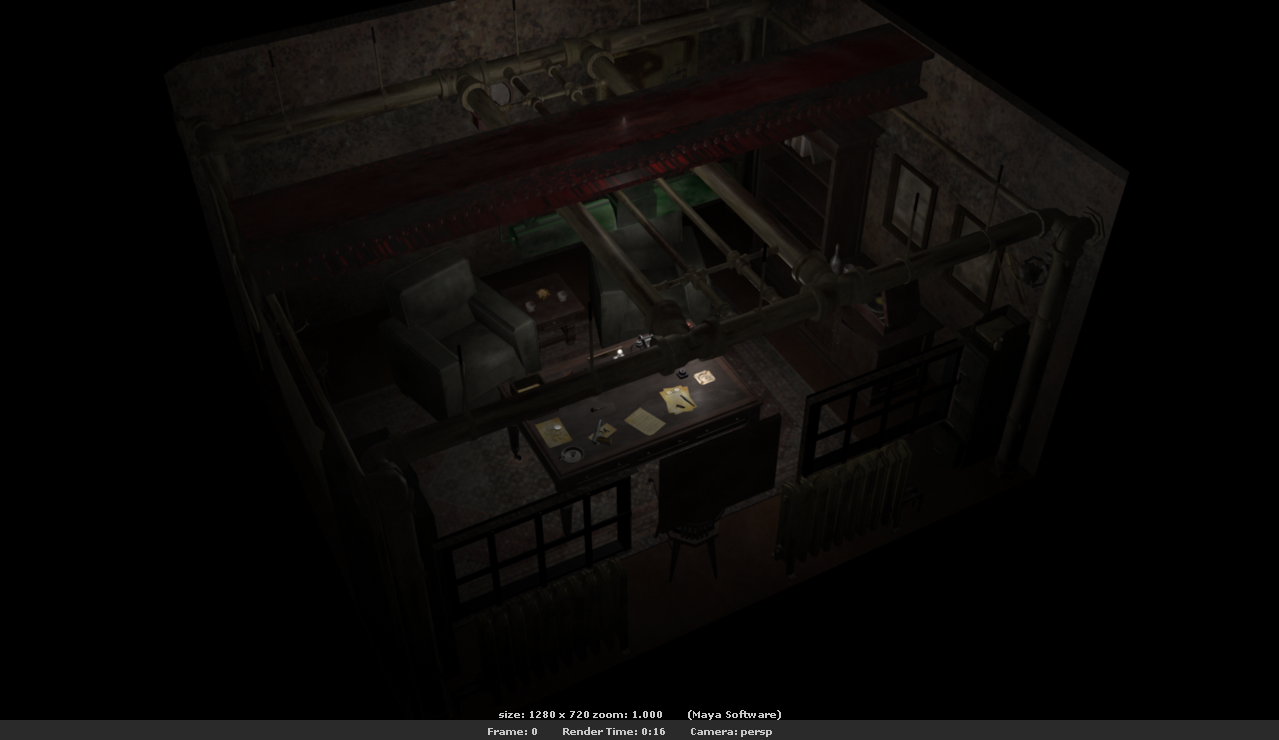
room pic with all object and textures applied and full lighting to have a better look at the room done by Reno Cicero and Jeff Chen


other lighted object by Jeff and Reno


Final for room lighted by Reno and Jeff
render test of sea forts with lighting and sea animation made by Jeff and Reno
Second Test Render from Reno Cicero on Vimeo.
sound tract found by reno and jeff